Create an AIssistant
Navigate to the Control AIssistants page and in the Actions column, click Add new AIssistant.

The creation wizard opens. Let's go through the steps!
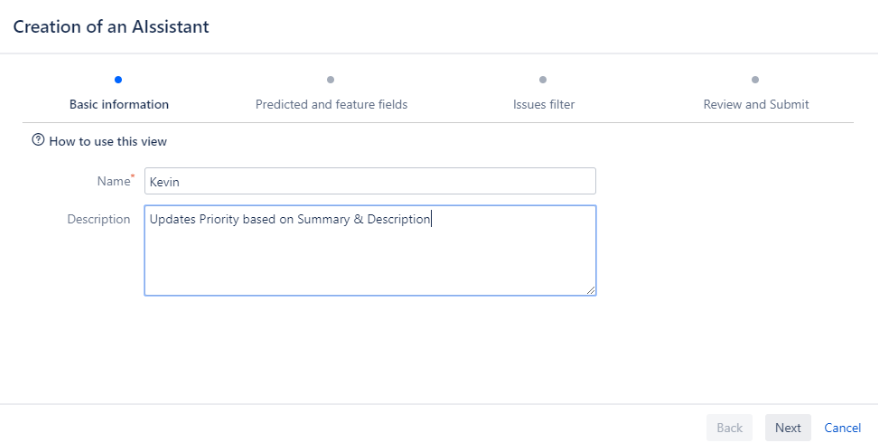
Step 1 - Basic information
The first step is to name your AIssistant and provide an optional description. The name has to be unique to help you distinguish between AIssistants. The description can help you remember your AIssistant duties, especially if you have not used it in a while.

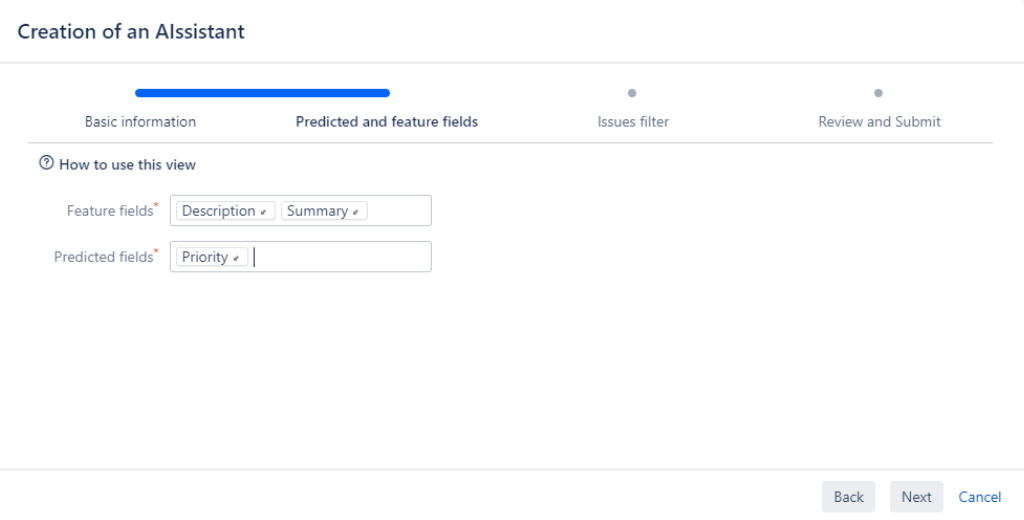
Step 2 - Feature and Predicted fields
The fields that already contain information are called Feature fields. The fields you would like the AIssistant to fill in or modify are called Predicted fields.
Feature fields serve as a guidance for your AIssistant in the decision-making process of updating Predicted fields. You should only choose fields containing valuable information that you rely on yourself when updating other fields.
Predicted fields are updated by the AIssistant with predicted values based on the data in Feature fields. Choose the fields that you need to fill in or modify in your issues.
For example, you can use issue Summary and Description as Feature fields, and Priority as a Predicted field.
When creating a new AIssistant you must define both Feature and Predicted Fields. If you skip this step, the AIssistant will not be able to process issues.

We'll discuss Feature and Predicted fields in more detail when it comes to training your AIssistant.
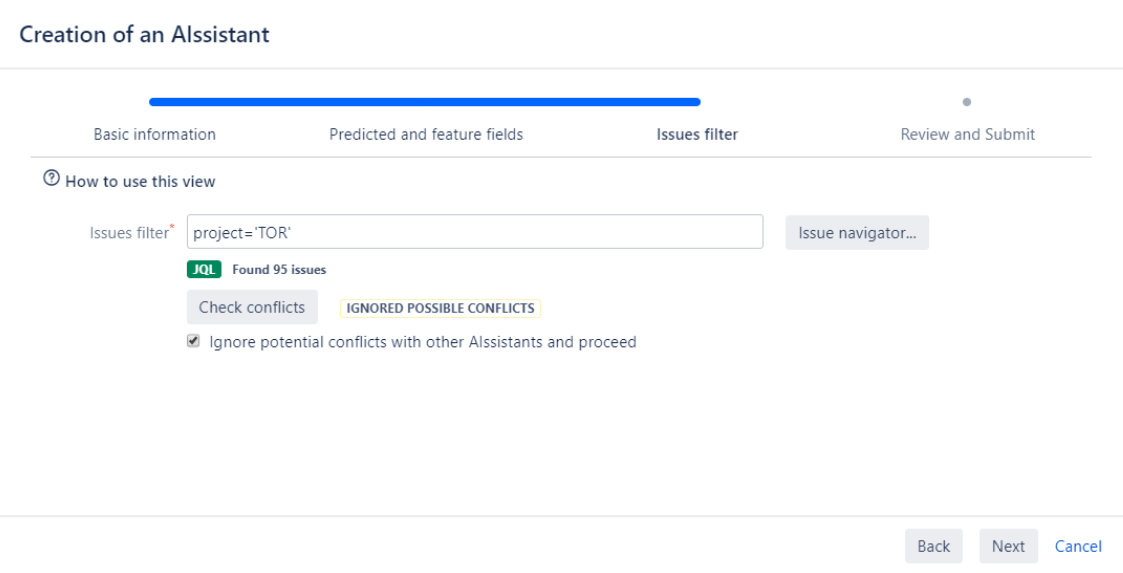
Step 3 - Issues filter
We suppose your Jira has issues of different types across various projects, and these issues share the same fields. By default, a new AIssistant works with all issues in the current project.

You can apply a JQL filter limiting the AIssistant scope to specific projects as well as issue types and their other attributes. For example, if you need the AIssistant to work only on bugs in the project TOR, you should set the filter to include only bugs.
project = 'TOR' AND issuetype = Bug
You don't have to make a filter very narrow, as you can always define more granular filters before running the AIssistant.
Note. If you run into a conflict, this means your new AIssistant uses the same Feature or Predicted fields as other AIssistants you have already created. Review their settings and adjust them, or change Feature and Predicted fields for the new AIssistant.
Step 4 - Review and submit
On this step, you simply click Submit to create your AIssistant.
Now let's train the AIssistant you just created!
